How can we help?
DataXchange Service
Overview
The DataXchange Service, referred to as the DX Service, is the engine of the collection process. The Service communicates with the equipment and evaluates expressions to determine what data should be entered into the data collection system. The DX Service is a separate installation and should be installed on all computers in the plant that will actually be communicating with the equipment. At least one DX Service is required, but additional services can be installed to distribute the load if there is a large quantity of equipment or multiple physical locations.
When a new DX Service is installed and connected it will be shown in the Manage → DX Service section. All Services that have been defined will show in the drop down menu when the DataXchange → Connect button is clicked. Each Service can be configured through the client application by connecting to the Service.
Installing the DX Service
See DataXchange Service Install.
Connecting to the DX Service
The application will attempt to connect to the computer running the service using HTTP. Assuming the defaults were used when installing the DataXchange Service, the communication will take place over port 80. It is also possible to designate a different port during the DX Service installation. If the port needs to be changed after installing, the how-to guide contains the proper steps on changing the HTTP communication port of the service.
Once connected the ribbon bar will fill with additional buttons. Click here for detailed information on these buttons.
Configuring the DX Service
When connected to a DX Service, clicking on the service flag will show the DX Service settings.
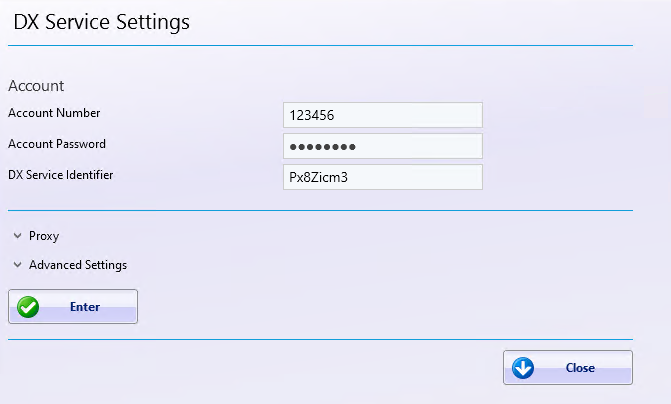
The DataXchange service must be configured to use the appropriate account information. This can be done either during the Service installation process or from this screen.
The Account Number, Account Password and DX Service Identifier need to be entered. If the information has never been entered then the information from the Account Settings on the User tab and DX Service settings on the Manage tab will be filled in automatically.
Proxy Settings
If a proxy server is used for Internet access the proxy settings can be used to match the required settings for the organization. The majority of the time these settings will not need to be modified. These settings will be copied over from the User tab automatically if they have been configured there.
The Bypass List should be used to specify addresses that will not use the proxy, such as names or IP addresses of machines that utilize HTTP. For example, machines that communicate via MTConnect or OPC UA. The Bypass On Local checkbox may address this issue if the CNC machines are on the same subnet as the DX Service. If not, then the bypass list will need to be used. An asterisk (*) can be used as a wild card, such as in 192.168.*.* or 10.*.
Advanced Settings
The Advanced Settings outlined below should not be modified unless instructed by authorized support personnel. The application has a built in Application Username called DXService and Application Password for the DX Service. An administrator of the system can reset the DXService password if needed.
The Connection Interval determines how often the service will attempt to reconnect to the Cloud services if the connection has been lost. The Maximum Retries determines how many times the service will attempt to insert ‘bad data’. Bad data may be caused by a temporary error on either the client side or the Cloud side. If the Connection Interval is set at 2 minutes, and the Maximum Retires is set at 3600, then the service will attempt to retry the failed records for 120 hours, or 5 days. At that point the bad data will be removed.
The Batch Count determines how many records will be processed at a time when the service is able to reconnect and process records that have been built up.
The Service URL is the web address of the Cloud services.
The HTTP Services Port gives you the ability to change the port at which the service operates on. See the how-to for more clarification on how to change the operating port.
The DCI Port is the port number the DX Service will use to listen for DCI requests. This does not need to be changed unless another program on the DX Server is using this port.
The Auto Refresh setting determines whether the DX Service pulls up-to-date information for every machine when clicking Connect in the DataXchange software. If connecting to the DX Service takes a long time, disabling this setting may improve performance.
The Change Endian setting is only used by the DWM source. If a DWM source is being used, this setting must match the settings used on the DWM machines.
Restarting the DataXchange Service
If data collection is not working as expected, the DataXchange Service may need to be restarted. Go to the DataXchange tab and click the Restart button. Select the service to be restarted and confirm the action. The DataXchange service should restart within a few minutes. More detailed instructions can be found here.
Backing Up the DX Service Configuration
The configuration for the DX service is stored in the cloud database. The configuration can be backed up to a snapshot and then exported later if needed. Details on the snapshot and export process can be found on the Snapshot and Export page.
Updating the DX Service
The DX Service must be manually installed, but after the initial installation the service will update itself automatically. The details on the update process can be found on the Update page.