How can we help?
Change the DX Service Port
Overview
When changing the port of the DX service it is important to follow the instructions below. Failure to do so may result in loss of communication with the DX Service. This tutorial does not cover firewall settings to allow connections on the new port. The basic steps of this tutorial can be broken down into three primary categories:
- Use the DX Service Setting to change the port that service is operating on.
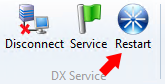
- Restart the service using the restart button in the upper right of the ribbon.
- Change the settings of the DataXchange Service under the Manage → DataXchange button on the ribbon.
First ensure that you have the correct permissions to access the Manage and Communication as well as the DataXchange and DX Service tabs.
- Log into DataXchange using an account that has the correct permissions.
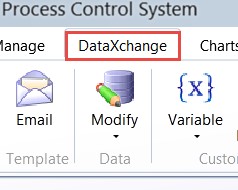
- Once logged in click on the DataXchange tab.
- Connect to the service that you would like to update the operating port on.
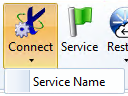
- Once you have connected to the service click on the flag button named Service. (The flag may be Red or Green)
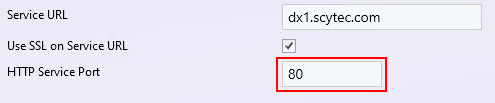
- Once the DX Service Setting screen has opened expand the Advanced Settings section. The default port is 80 but it can be changed to operate on the port of your choice as long as it is not already being used.
- Update the port and Restart the service. You can do this by using the Restart button under DX Settings in the ribbon.
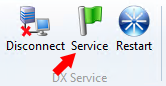
- Now you need to update the service port under the Manage tab → DX Service.
- Find the name of the machine or IP of the DataXchange service is installed on.
- Select the service then hit the modify button.
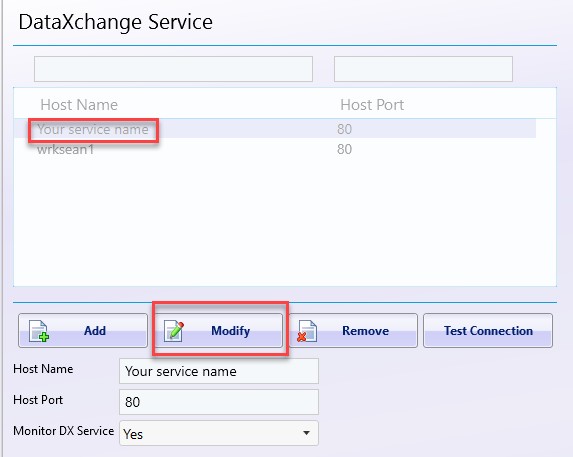
- Modify the service port number to the same port number you configured above.
- Go to the DataXchange tab and connect to the modified service. If you are not able to connect, ensure the service has started and double-check the settings under Manage → DX Service.