How can we help?
Creating a DataXchange Webhook in Microsoft Teams
Overview
In order to send messages from DataXchange to a Microsoft Teams Channel a Workflow Webhook must be created. This links the Teams Channel to your DataXchange account, allowing messages to be sent.
Creating a Workflow
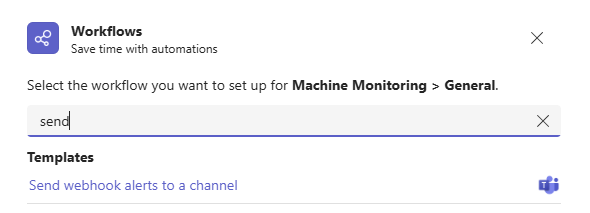
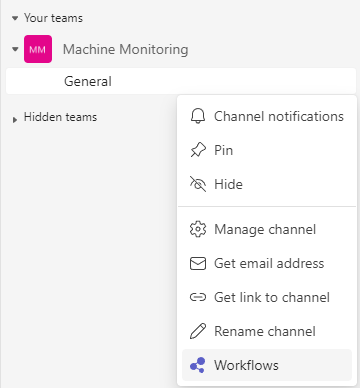
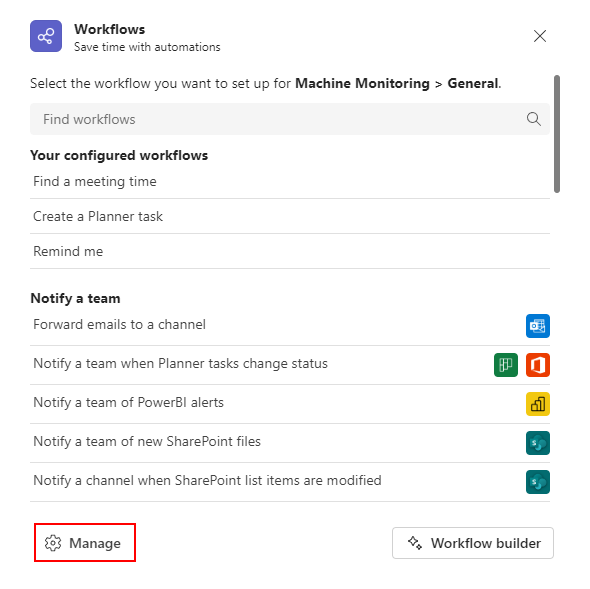
The first step to creating a Workflow is to go to the Teams section. From there, find the Team and Channel where you want to receive messages from DataXchange. Click the … button next to the Channel in the list and click Workflows.

In the Search box above the list of workflows, enter “post” then select Post to a channel when a webhook request is received.
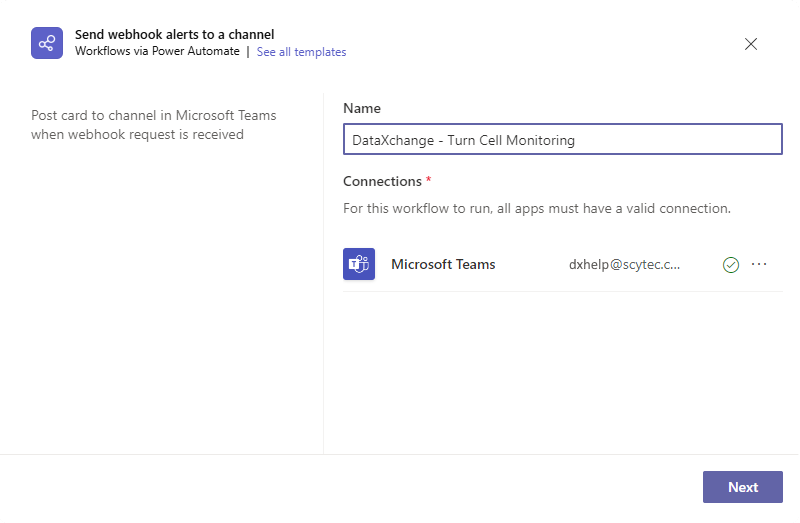
Enter a Name for this workflow for reference. Click Next.
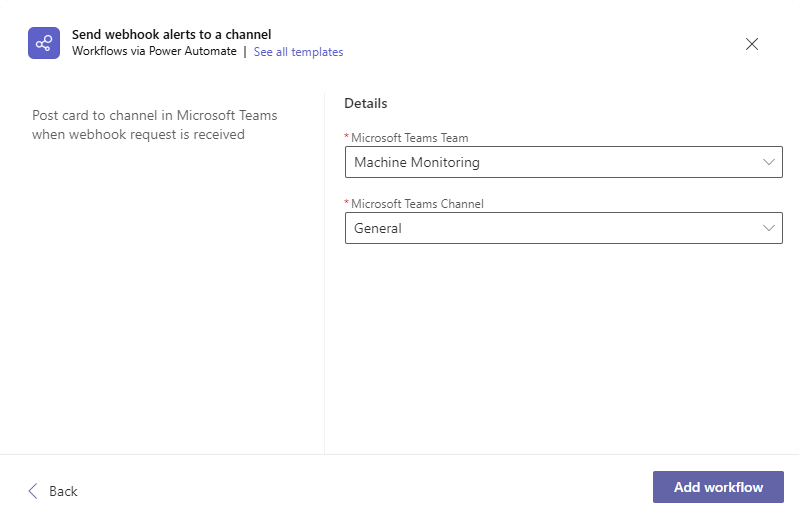
On the next screen, click Add workflow.
On the next screen, Workflow added successfully! should appear. There will be a URL shown. Click the Copy button next to the URL. This URL is needed to link DataXchange to the Teams Channel. Avoid pressing Done or closing the window for now so the URL can be retrieved again if needed.

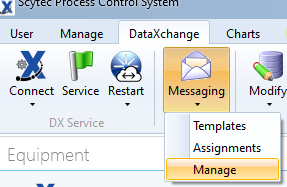
Now, open the DataXchange Windows Application. Log in and go to the DataXchange tab.
Go to Messaging → Manage.
Click Add. Enter the name of your Team and Channel, then paste the URL from earlier in the Webhook URL box. Click Enter when finished.
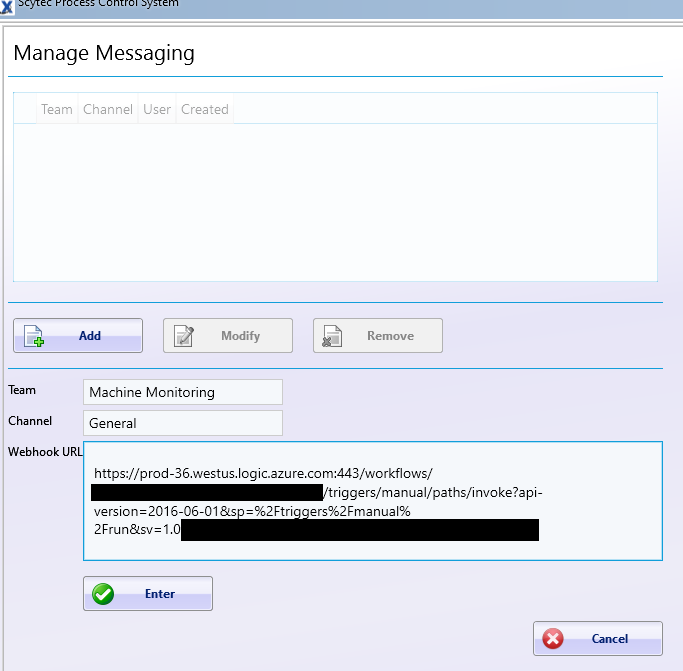
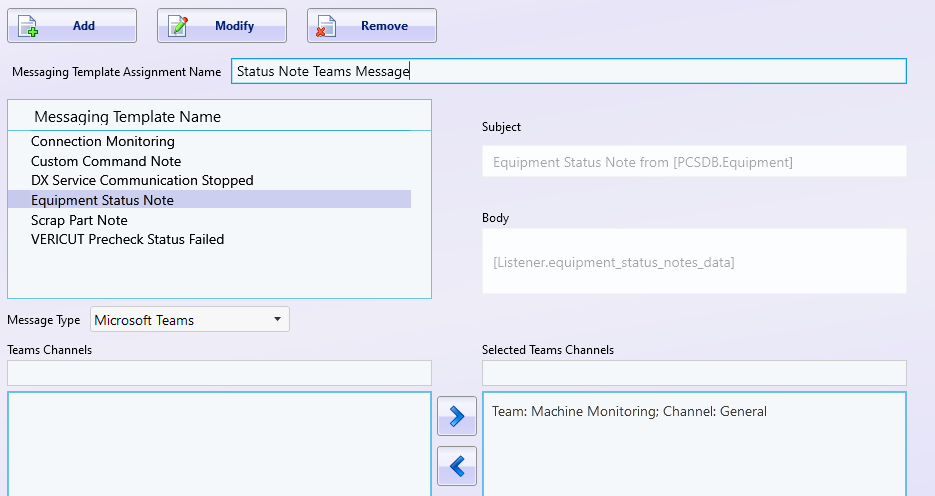
Now this Channel can be selected as a Messaging Template Assignment which allows it to be assigned to expressions, similar to a user’s email address.
Retrieving an existing Webhook URL
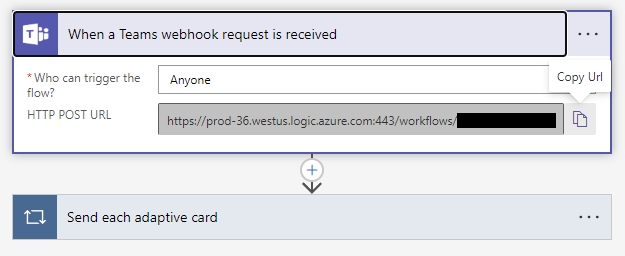
If the Webhook URL needs to be accessed later, it can be found within the Workflow settings. Go back to the Teams Options and click Workflows.
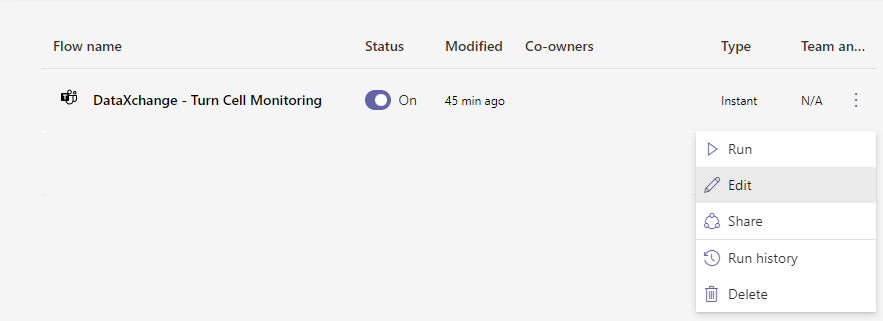
Click Manage.
Click the … button and select Edit.
The Workflow process will be shown. Click the Text of When a Teams webhook request is received to expand it – do not click the … button.
Once expanded the URL will be shown, and the Copy URL button can be clicked so the URL can be used.