How can we help?
Configuring the HAAS NGC
Overview
Before DataXchange can communicate with this system, the IP address must be set on the control. Most HAAS NGC controls support a wired or a wireless Ethernet connection.
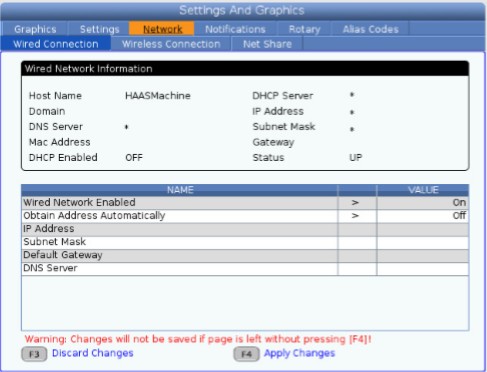
For a wired connection
- Select the Wired Connection tab in the Network tabbed menu.
- Change the Wired Network Enabled setting to ON.
- If your network has a DHCP server, you can let the network assign an IP address automatically. Change the Obtain Address Automatically setting to ON, and then press [F4] to complete the connection.
If your network does not have a DHCP server, go to the next step. - Type the machine’s IP Address, the Subnet Mask address, the Default Gateway address, and the DNS Server name into their respective fields.
- Press [F4] to save the settings.
For a wireless connection
This option lets your machine connect to an 802.11 wireless network.
Wireless network setup uses a wizard to scan for available networks and then set up the connection with your network information.
- Select the Wireless Connection tab in the Network tabbed menu.
- Press [F2] to scan for available networks.
The Connection Wizard displays a list of available networks, with their signal strengths and security types.
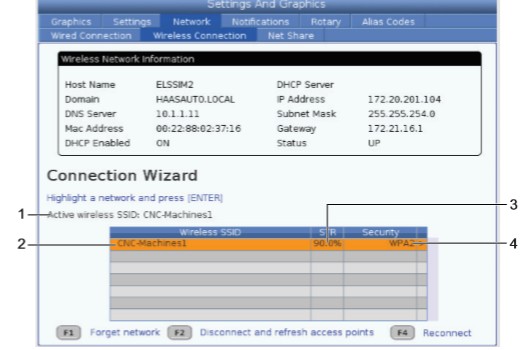
- Use the cursor arrow keys to highlight the network you want to connect to.
- Press [ENTER]. The network settings table appears.
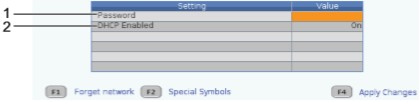
- Type the access point password in the Password field.
- If your network does not have a DHCP server, change the DHCP Enabled setting to OFF and type the IP Address, Subnet Mask, Default Gateway, and DNS Server Address into their respective fields.
- Press [F4] to complete the connection.