How can we help?
Configuring ODI Layouts
Overview
Data on the ODI will vary in its usefulness depending on the shop floor or even specific machine. For example, if some machines collect part or work order data but others do not, there is no need for those fields to appear on the machines that don’t use them. To adjust these fields either by reordering them or removing them altogether you will need to create an ODI layout.
Creating ODI Layouts
ODI Layouts are created under Manage → (Settings) → Application → ODI → ODI Layouts. Initially the Default Layout will be the only option. You can either Modify this layout or create a new one from scratch by clicking Add. Click and drag a Parameter from the left onto an Equipment Card on the right.
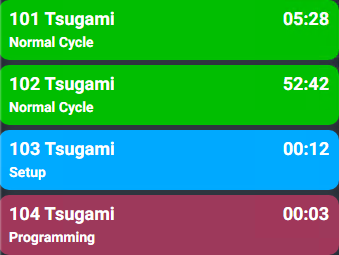
These are the Small Equipment Cards, shown on the side of the ODI screen:
This is the Large Equipment Card, shown on the ODI:
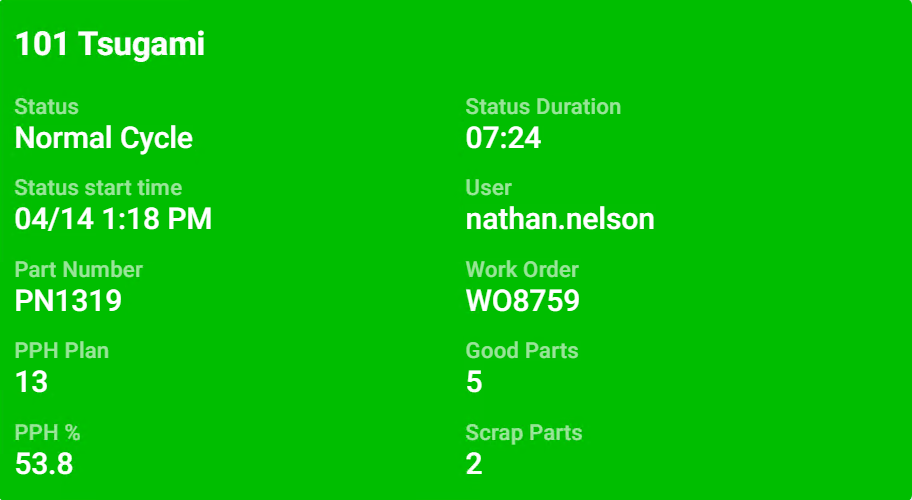
The Large Equipment Cards are also shown on the ODI Equipment Overlay. As more equipment is shown on the Equipment Overlay, there will not be enough room to show all of the data on the equipment card. Data will disappear to make room for more equipment cards starting from the bottom, so put the data you most want to see at the top of the card.
Assigning Layouts
Once a layout has been created, the layout will need to be assigned to equipment. This is done from Manage → (Settings) → Application → ODI → ODI Layout Assignments. Select the checkboxes next to equipment to modify the assigned layout, then select the desired layout and click Enter. To revert to the default layout at any time, select the equipment and then check Clear Value. Click enter and any assigned layout will be removed, reverting the equipment to the default layout.