How can we help?
Automatically Enter Shift Break Downtimes
Overview
This example will show how to start and end downtimes during scheduled shift breaks. Note that these expressions and downtime statuses may exist already. By default the Break downtime status identifier is now 201.
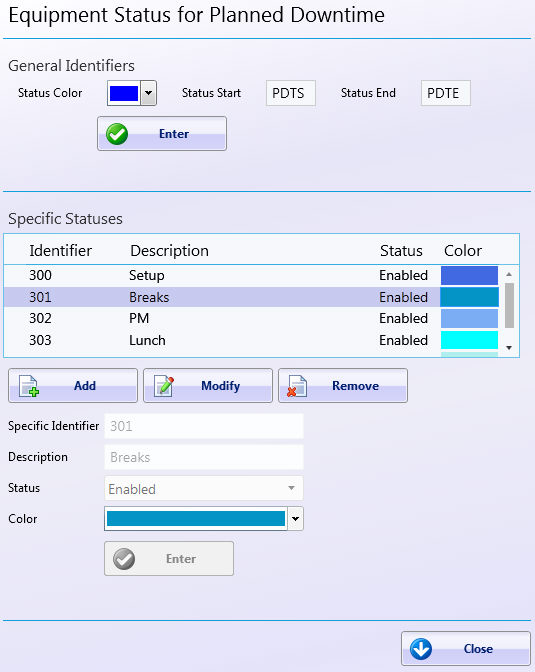
- Define the specific planned downtime equipment statuses which is done under Manage → Equipment Status → Planned Downtime Statuses. Press the Add button to define a new specific status or select an existing one. Make note of the Specific Identifier, as it will be needed to create expressions. In this example the Identifier is 301. The description is what will show in the charts and reports along with the assigned colors.
- Define the shift breaks and assign the associated planned downtime to the breaks.
- Create the expressions. Go to DataXchange → Expressions → Create Expressions to bring up the Expression Builder. Press the Add button to create the new expression.
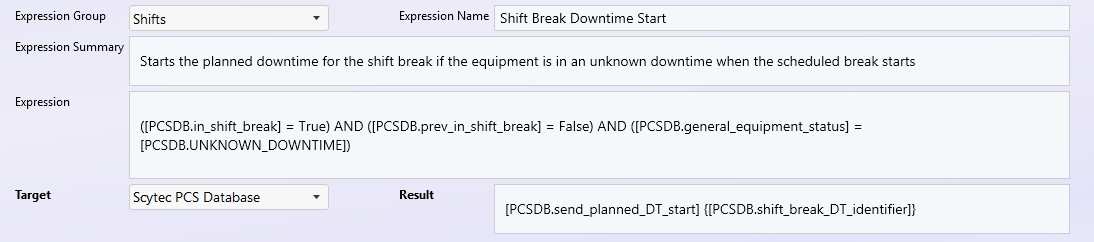
- Select an Expression Group to help organize the expression or select None. Provide the desired expression name and optionally an expression summary. Click in the Expression window to enable the buttons in the ribbon bar and use the PCS Database and Focas variables to create the expression as shown below, or type directly in the Expression window:
([PCSDB.in_shift_break] = True) AND ([PCSDB.prev_in_shift_break] = False) AND ([PCSDB.general_equipment_status] = [PCSDB.UNKNOWN_DOWNTIME])
With the target set to Scytec PCS Database and a Result of:
[PCSDB.send_planned_DT_start] {[PCSDB.shift_break_DT_identifier]}
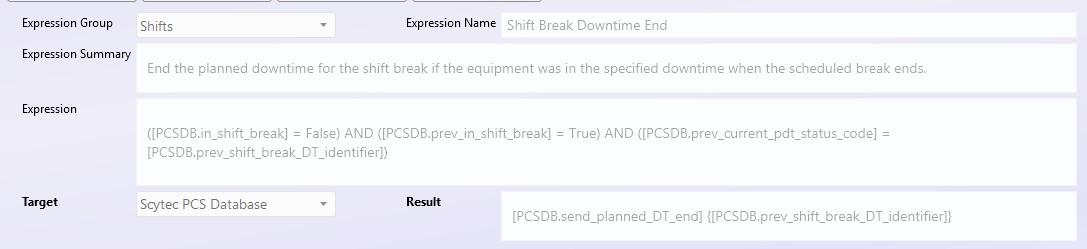
- Optionally, create a second expression which will be used to end the downtime. There are many ways to create the End expression, the following is one example.
([PCSDB.in_shift_break] = False) AND ([PCSDB.prev_in_shift_break] = True) AND ([PCSDB.prev_current_pdt_status_code] = [PCSDB.prev_shift_break_DT_identifier])
With the target set to Scytec PCS Database and a Result of:
[PCSDB.send_planned_DT_end] {[PCSDB.prev_shift_break_DT_identifier]}
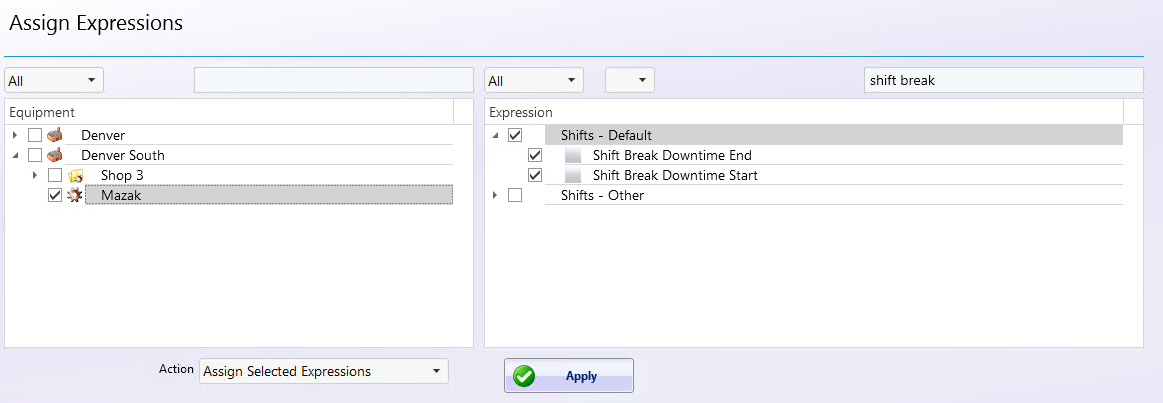
- Assign the expression(s) to the desired equipment. From the main DataXchange screen select Expressions → Assign Expressions. Select the desired equipment on the left and the newly created expressions on the right and press the Apply button.